Pierre has left us, but his legacy lives on in his myriad optical creations. This page will chronical the rebuilding of one of them-his motorized, 8" F/4 binocular chair. I happened onto it during one of the first SAC ATM meetings. A lot of Pierre's equipment and supplies were left behind. Some were brought to the metting for input on what to do with it. Someone was suggesting we split the optical tube assemblies into two 8" F/4 Dobs to be used as club scopes for newbies. I found this idea abhorent, so I volunteered to take it all home, evaluate its disposition and refurbish it if possible. I had a plan to install it in the rolloff roof of my Stone Haven Observatory, for use by visitors to star parties I regularly give. It's only been recently I've been able to find the time to look into the restoration. I believe I'll have most of the materials I need on hand, but some restoration of the building is now in order. More on that later. In the mean time, I'll take pictures of the chair in its present state and as it gets fixed. I'll also be entering the plans into a CAD program to document all dimensions and so on. I hope you're sitting comfortably...
The chair consists of four basic structures. The base, the azimuth box, the chair section and the optical tube assembly. This page will describe the Azimuth box and subsequent pages will describe the other major parts. Hopefully, this arrangement will cut down on the load times for all the pictures I'll need to include.
The azimuth box is made of 2, 9" x9" x 9" cubes, connected along one plane by a horizontal section ~3" in height.
The final assembly is shaped somewhat like an inverted "U". It's made mostly of 3/4" plywood,
with one piece of 1/2" plywood mounted horizontally across the inside of the U. It was enclosed in the width
dimensions with 1/8" hardboard, with an interesting parque wood grain pattern printed on the surface. The same
pattern can be seen on the OTA's. The hardboard has split across the diagonal of one of the cubes, and the glue
between the horizontal member and inside vertical member failed, rendering the
box unstable and even dangerous. This section will have to be rebuilt from scratch. I intend to make it from 3/4",
furniture grade Baltic Birch plywood, and replace the hardboard with 1/8 Birch plywood, which I have onhand.
Mounted
in the low part of the U is the azimuth motor assembly. The unit is designed to easily turn the OTA, the az box and the occupant.
It runs on 12 Volts, supplied originally by a car battery mounted on a shelf in turn mounted on one side of the az box. Total
weight of the az box and motor is 61 lbs. The motor assembly is intact and works well except for one altitude limit switchbeing
broken and one azimuth directional switch on the remote control being bad. Cost to replace these items may run as high as $5 US.
The az box with motor weighs 61 lbs.
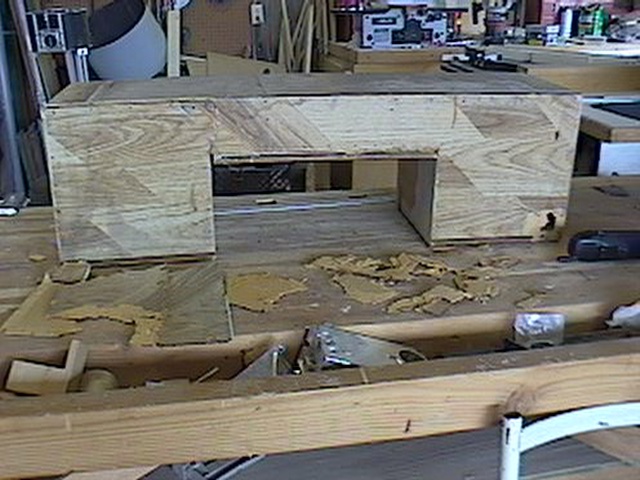 | View of the back of the Azimuth Box shows the generally poor condition of the hardboard consruction. Note the hole at lower right and the crack upward from the left side of the "U". |
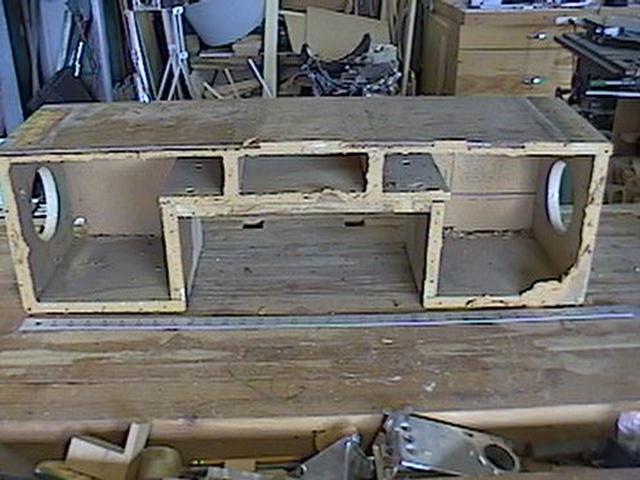 | This view from the front came after I'd removed the broken hardboard. Notice the failed glue joint on the left side of the box on the right, where it meets the horizontal section of the "U". |
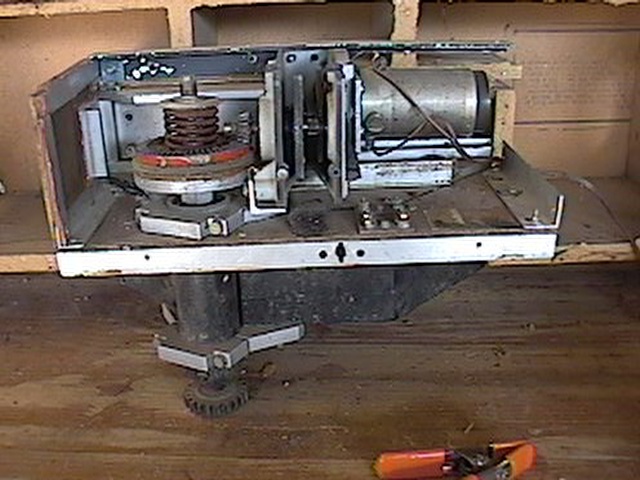 | Cloeup of the azimuth motor, gear reduction box and clutch. Motor is cylinder on the right, gear reduction dead center and clutch on left. Note the gear differential and spring loaded clutch on the left, and the gear at the bottom of the shaft . This is the gear that meshes with the gear on the base for azimuth motion.. |
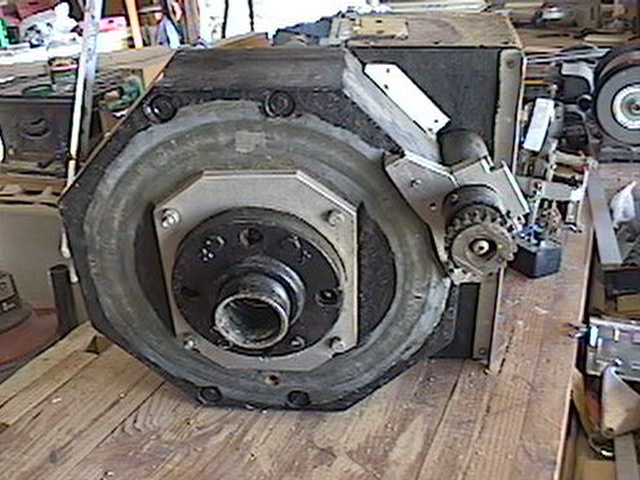 | View from underneath the motor assembly. There's the mating side of the azimuth bearing "race", and the drive gear.. |
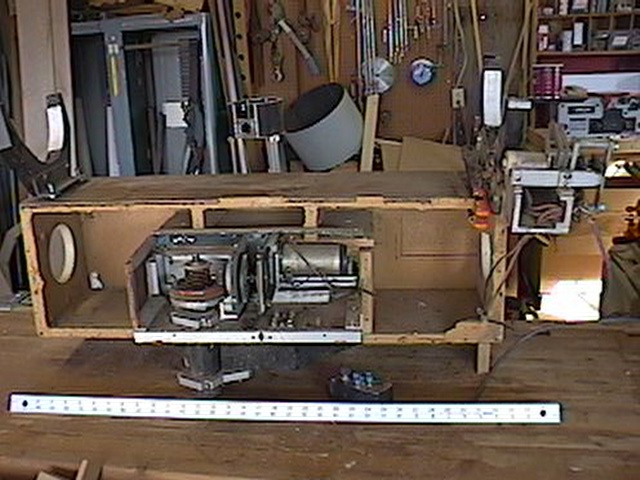 | Here's kind of how it goes together. The mounting bolts are not engaged through the az box, but you get the idea. There's a cover over the motor assembly that acts as a step of sorts. I still haven't figured out what the holes in each end are for. ? |
The new, refurbished parts of the chair will be described here.