The Practical Telescope #3
by Dennis Allen
I was cleaning out the attic to our club house when I came across an 8.25" wide, 8.25' long black fiberglass tube. This tube had a 6" mirror, mirror cell, secondary in a spider, and focuser. I couldn’t believe it. How did this telescope get into the attic? Must have sat there at least a decade. I decided to try and get it in working condition.
The old focuser was shot, so I ordered a basic 1¼" rack-and-pinion focuser from Orion telescopes. Now this new focuser required a slightly larger hole. Have you ever tried to drill out a 1¾" hole in an existing 1½" hole? Not pretty. After chewing up fiberglass, I took a piece a ¼" plywood and drilled a 1¾" pilot hole. Then I used the old focuser mount holes to screw down the plywood. Worked great. Next time, however, I have to remember to make a wood jig FIRST.
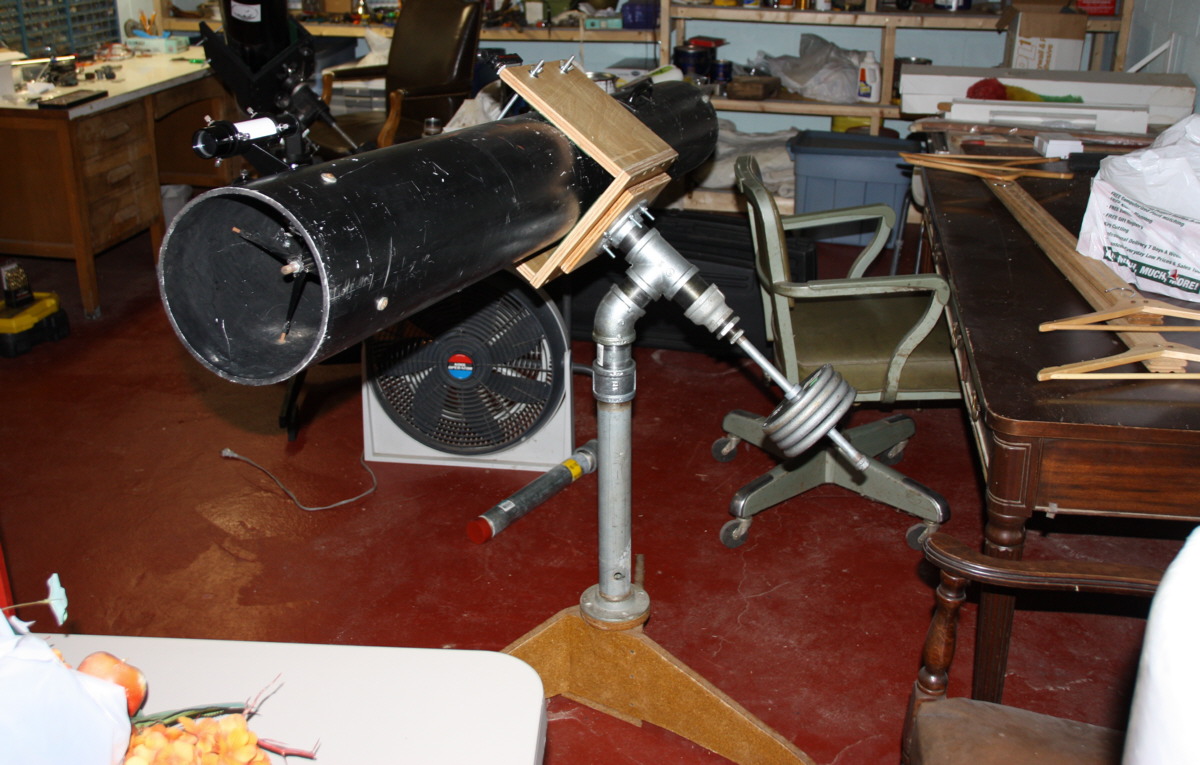
Now the tube diameter is 8.25”. Couldn’t find any tube rings that size, so I went old school and fabricated a simple tube box. Three pieces of ¾" plywood, the base ten inch square, the sides ten by twelve, screwed together to fit around the tube. Two foot long 5/16" screw rods with wing nuts at the top of the box allow you to tighten the box around the tube. At the bottom of the box, couple of ¼" bolts with wing nuts to secure to the mount. To finish the box, I lined it with self-adhesive green felt, and put down a coat of Polyurethane.
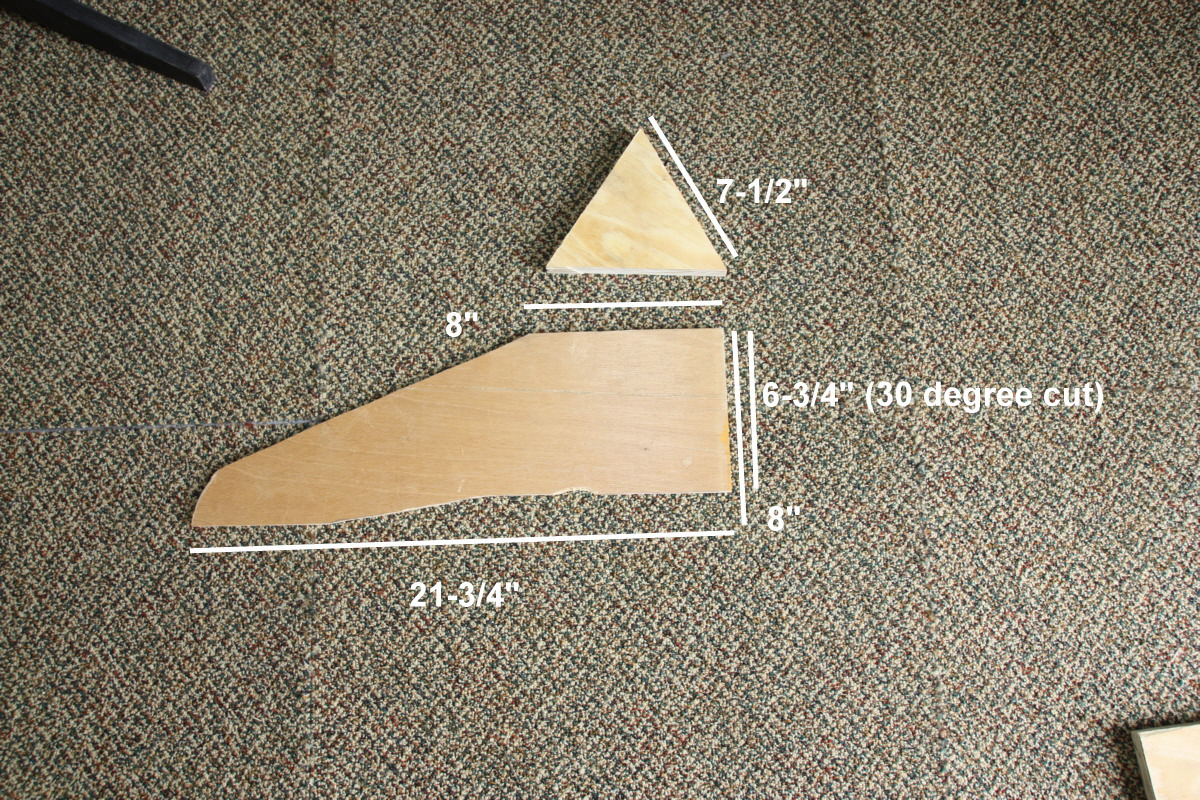
Next, I made a simple equatorial pipe mount. We already had a 2" pipe base from another donated mount. This base consists of three sections of ¾" plywood., 21" long, 8" wide at the base. The inside edge of each piece has a 30 degree cut. They come together to form a triangle, 6" to a side. There are two triangle pieces of wood that cover the top and bottom. Note the bottom triangle piece never actually touches the floor.
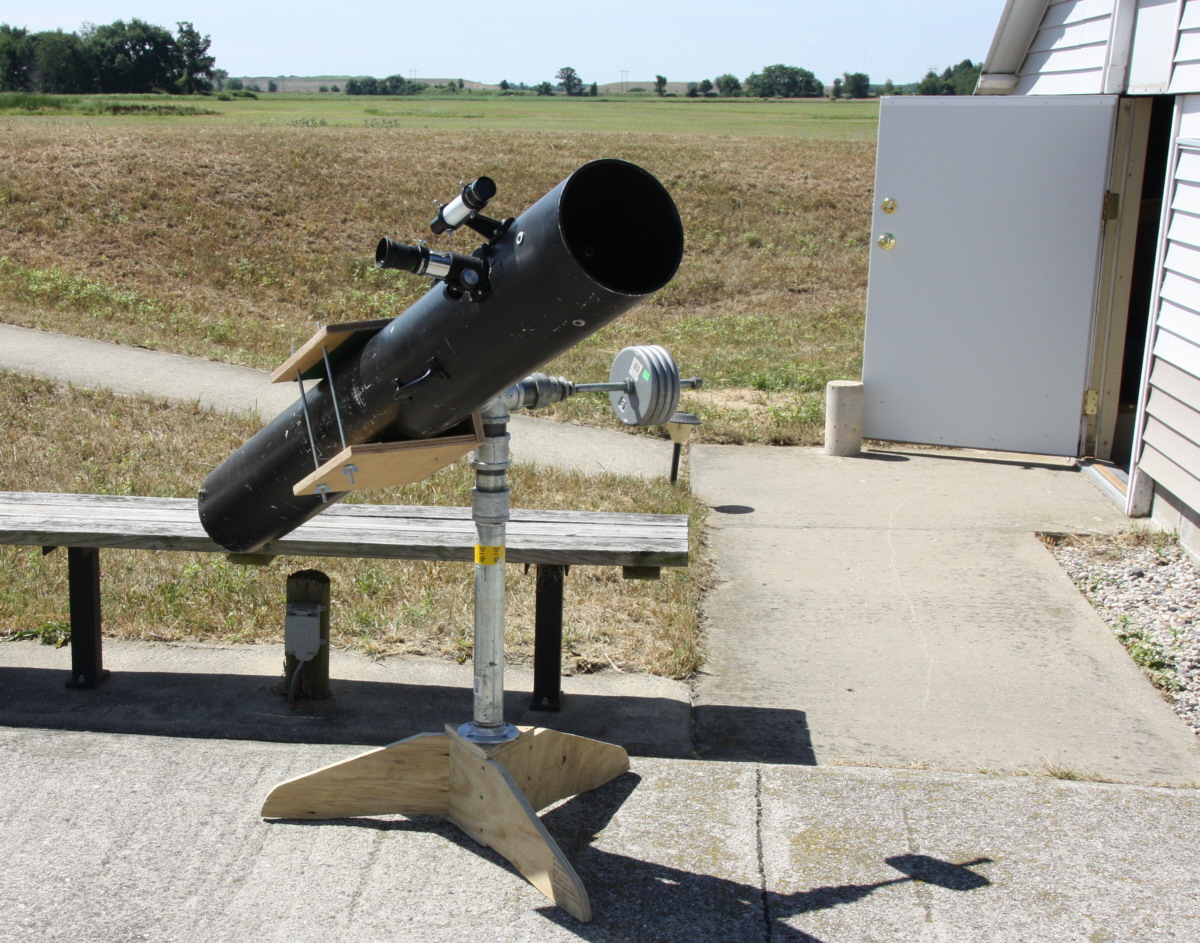
The top is capped by the 2" pipe flange and a 2' length of 2" pipe. To this base I added 45-degree elbow (our latitude is 43-degree). From the elbow, another 2" short pipe to a tee. One end of the tee I attached another short pipe to a 2" floor flange. I mounted the flange to a simple wood plate for the tube box. The other side of the tee I used reducers to go from 2" to 3/8", to which I added a one foot section of 3/8" pipe. Used couple ¾" shaft collars to hang my 5lbs. cast-iron barbells. Oh, since I have a 3/8" shaft and counterweights with a 1" bore hole, I found that a short ¾" PVC riser makes a good bushing. For a finishing touch, I added a small finder and Red-Dot Laser pointer.
Summer 2018
Last Saturday was my first chance to try out the equatorial pipe mount. To tell you the truth, not happy. I was constantly flipping the scope and rotating the tube, depending on the area of sky. And my 45 degree elbow kept wandering away from Polaris. Very aggravating.
I thought about adding set screws and fabricating slow motion controls, when a visitor suggested I convert the scope to a Dobsonian. Well, a rocker box for this scope would be very tall. The center of gravity would be extremely high, almost unsafe. Then I saw images of cloudynights.com pipe piers. Most of them were just a tee, scope on one side and counterweight on the other side. I never considered that design, didn't think I could get the correct balance. Ah, use the 45 degree elbow. Loosen up the elbow, get the correct balance, then remove the elbow and go to a straight tee.
Summer 2020
I haven't seen this telescope out of the shed in a couple years. I suspect it's just too heavy to haul out for casual viewing. A thought. Could we eliminate the counter-weights? I was thinking a fork mount. Someone suggested contra-rotating flanges. From the T, two short pipes to two flanges screwed to a wood base. As one flange loosen, the other tightens. I tried this double flange system. Tried various ways, both flanges tight, one flange one quarter turn loose, one completely loose. With the altitude loose enough to be smooth, the scope would snap straight up if you went too high. If the flange was tight enough not to snap straight up, the scope would be too jerky to move. No, the center of gravity is just too high for that kind of mount.
Hmm.. What about single fork arm? Like the old mount, the weight of the scope on the altitude flange might keep movement smooth. Well, with a couple elbows and a lot of trial-n-error, I came up with a single fork arm.
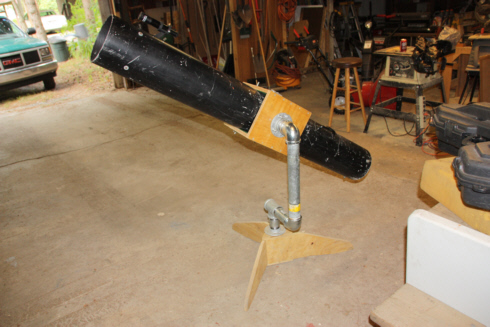
I was hoping this mount would work. Be nice to pick up the entire scope all at once. I tried out the scope, however, too shaky to be comfortable. If I had to guess, too many connections. I could try it on the 2" pipe pier, but that would defeat the purpose (portability). I reassembled the counter-weight system. Used a 45 degree elbow to balance the scope and counter-weights. Still a little shaky on the tripod, but not bad. A lot more stable then the single fork-arm. Next summer, I'll leave the tube box and counter-weights on the 2" pipe pier. The tube can stay in the shed until needed.
Winter 2021
I saw a design for a wooden equatorial mount on cloudynights.com and had to try it out. Started with a 47"' post pointing to Polaris. Framed a couple of 34" 2"x4" legs, 33" wide to hold the post, creating a 3' high tripod. A block of wood on the post keeps the legs from sliding down the post. Hooks, chain, and turnbuckle prevents the legs from kicking away from post. Mounted a 2" flange on top of the post, a short 2" pipe to a T connected to the scope and counter weight. It took me awhile to fabricate this mount, had to get the dimensions right. The center of gravity is a little to the north, but not bad enough to make it tipsy.
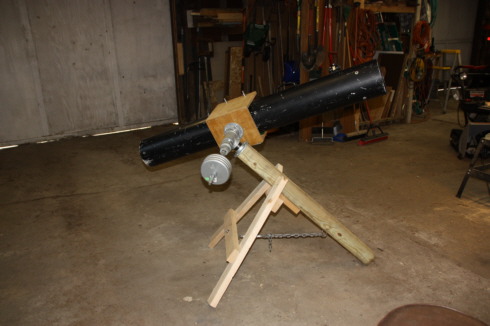
Had a chance to try the equatorial wood mount and compared it to the tripod pipe mount. I found the equatorial mount heavier and more difficult to setup. In fact, I had to remove the counter-weights and make a third trip to the backyard. From what I could see, the equatorial wood mount is no steadier than the tripod pipe mount. And I never stayed on any one object for long, so I couldn't tell if the equatorial mount tracked better. Oh well, had to try.
Hmm. I might try a clutch system next. The same cloudynights thread describes a two t clutch system and a RA stepper. With a t clutch, you add a couple PVC reducers to a t and thread an axis pipe. If I can get smooth movement on a set of clutches, I might revisit the single fork arm design. I don’t know if I’m capable, but I even might try a RA stepper motor.
Anyway, I hope this project gives you ideas how to build or refurbish your own telescope. Telescopes need to collect star light, not attic dust.
[Return to Top]
[Go to Home Page]
Copyright © 2005 Muskegon Astronomical Society, Inc.
This web page was last updated 05/23/25