Dome Reconstruction
by Dennis Allen
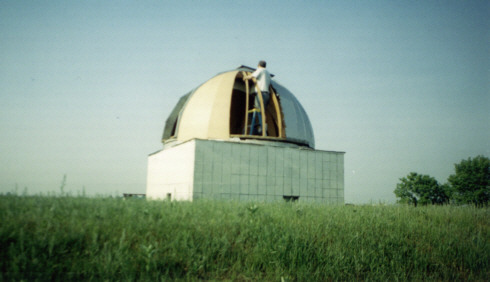
Over fifteen years old, our dome was starting to show it's age. Cracks had developed in the skin. In places, you could see daylight. Plus we had holes in the collar from installing the steel channel. Rain was getting in, threatening to ruin the ribs and our 15" telescope. It was time to rebuild.
The Observatory Design
For a quick overview, our dome sits on with a 12' square concrete pad. For a permanent prier, under the center is a fifty-five gallon drum filled with concrete. PVC pipes were installed for electricity. The brick walls are 4' high with two small vents, three electrical outlets, and a solid wood door that swings outward. The four building corners use standard 1/2" plywood and rolled roofing. There are eight 6" dolly wheels, evenly spaced and pointing upwards. There are eight pieces of 2"-by-6" wood between the wheels, rounded to shape the collar. The collar is simple 1/4" plywood, shape to fit under the dome.
The dome itself starts off as a 12' wide plywood ring, 36' in circumference. This ring consists of six layers of 1/2" plywood glued together. Steel channel was added a couple of years ago, to keep the dolly wheels from making indents into this plywood ring. The dome has two main ribs, four plywood sheets thick. These ribs make up the viewing slit. A three-layer rib runs perpendicular to the viewing slit rings. The remaining two-layer ribs are two to three foot apart. The ribs were covered by 1/8" Masonite panels. The viewing slit handles five 3'-by-4' 1/2" plywood shutters. Four metal hooks hold down each shutter and four chain binders hold down the entire dome.
Initial reconstruction
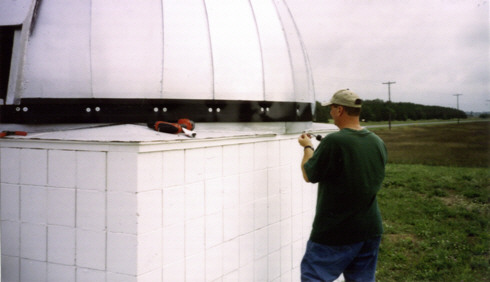
We started reconstruction two years ago. We had a break-in a while back, so we decided to use the thicker 1/4" hardboard for the skin panels. We used PL-400 sub-floor glue for the panels and 35 year brilliant white (and paintable) caulk to fill the cracks.
Removing the old skin off was not a problem. The old caulk scrapped off easily. When we installed the first new panel, however, we quickly learned not to overhang the last rib. ANY overlap interferes with the next panel. It was also better to shape the panel first, then install it. Even if you have to measure a dozen times. Trimming has a tendency to be messy and it's hard not hit rib.
Now each new panel covered the nail heads of the previous panel. With the curve of the dome, this leaves a crack that has to be caulked. We applied two coats of caulk and two coats of aluminum paint.
We started work midsummer. By the end of summer we only managed to get the southern half re-paneled. With only two people working at any one time, however, not bad. We did luck out on the ribs. Only one rib needed replacing and another needed minor
repairs.
Reconstruction this year (2002)
After skipping a year, the northern half of the dome developed cracks. Since we didn't have any more spare ribs, we needed to finish reconstruction this year.
Like the previous effort, removing the old skin was not a problem. Actually, installing the new panels went fast. After we remembered about cutting to fit BEFORE installing. The first real problem came on the last panel. Had a temporary panel covering the last new panel on the southern side. But this temporary panel wasn't caulked very well. Rains already worked into the last new panel and threaten to ruin it. Fortunately, we were able to cut away the bad stuff and save the rest.
Like any volunteer organization, finding help is never easy. Had to con a family friend to get the last two panels up. But with the panels up, I could do the rest myself. The caulking and painting went quick, but the collar took me a solid week. To get to the collar, I had to first remove the old building corners. Most of the old collar was gone. Simple enough to cut long 5 3/4" strips of 1/4" plywood, but I had to also spend time adjusting the 2"-by-6" round boards between the dolly wheels. The new collar has to fit inside the dome skin, yet remain outside the steel channel. Now I know why the old collar had long strips cut out of it.
Once I got the new collar down, I could rebuild the building corners. Each corner uses two sheets of plywood with a 2"-by-4" shim for the ridge. Under this shim I added a 2"-by-4", screwed to both the corner and the 2"-by-6" round board. It not only holds up the ridge shim, it allowed me to turn the round board so the collar curves away from the steel channel. Boy, had I known that only a small block of wood held up each shim, I would have never stood up on those corners all these years!
Made a new the top shutter. This shutter has no vent hole, so no need for a foam plug. I also figured a way to tighten that top shutter to keep the rain out, but you will need a crescent wrench to loosen the hooks.
Conclusion
The work is pretty much done. The outside brick could use a second coat of white. I used our flat red paint for the inside shutters. If this paint scuffs too much, however, we might have to go back to semi-gloss. The inside hasn't been painted, but we can do that next year.
The new indoor/outdoor carpet is installed. Jim Malda (see below) and Bill DeVette added a 6" strip of conveyor-belt for an outer skirt. With luck, it will keep the inside dry. The 15" telescope is back in the dome, cleaned and polar aligned.
Recent Events
Since completion, we've had a couple of good rainstorms. Wind driven rain tends to hit the lower collar and creep over it. Mostly on the southwest corner. Hindsight suggests I should have raised the dome and dolly wheels half a foot. This would have given us a taller lower collar, which would have meant a wider outer skirt. Perhaps I could install some sort of drip-edge on the lower collar.
On a good note. The top shutter is keeping out most of the rain. It does need a drip-edge, but just to keep out heavy easterly downpours.
Oh, one other thing. With the lower collar complete, it is now more difficult to turn the dome than it used to be. There is plenty of gap between the collars. As you turn, however, the upper steel ring gets pushed against a section of the lower collar. If that happens, you need to go over to the other side of the dome and break it free.
[Return to Top]
[Go to Home Page]
Copyright © 2005 Muskegon Astronomical Society, Inc.
This web page was last updated 08/20/14