Equipment Setup
The Telescope
The Meade LX200 8" and 10" telescopes come with either an f/10 or f/6.3 focal ratio. The f/6.3 system is preferred by most imagers. The faster focal ratio (f/6.3) gives more contrast and brightness to images which translates into less integration times. An f/6.3 focal reducer will make an f/10 system an f/6.3 system. Placing the focal reducer on the f/6.3 system will bring it down to f/4, a very fast optical ratio! The LX200 12" only comes with the f/10 ratio.
Alignment
Level the telescope using the bubble level located on the equatorial wedge *.
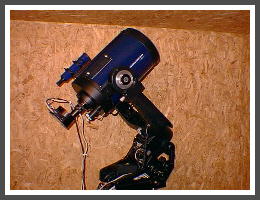
* It is essential that the LX200 be mounted on an equatorial wedge. (See above photo). A wedge is required for long duration imaging of deep space objects. A wedge is not normally required for lunar or planetary imaging. The wedge does not come with the LX200 , therefore, it must be purchased separately. The purpose of the wedge is to enable alignment of the rotational axis of the telescope to the Northern celestial pole (Southern pole in the Southern hemisphere).
Polar align the telescope using the "drift method" as outlined in the Meade owner's manual. If the telescope is not properly polar aligned, the imaging camera has to "chase" the guide star when self guiding. Careful attention to this will ensure less guiding correction errors.
Mounting The Camera


Nose adapter __________ T-adapter
Mount the ST7 on the telescope using either the 1 1/4" or the 2" nose adapter which is supplied with the camera. The 1 1/4" and 2" adapters slide in the barrels of either a visual back or star diagonal. The draw back of using this type of adapter is that the camera is only held in place by a 15 cent set screw! A more secure mounting device is the T-adapter which screws into the camera body and the other end is threaded on the rear cell of the telescope.
Align the Camera
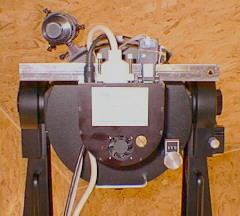
Use a straight edge to align the camera with the top of the fork mounts. This assures the chip in the camera is parallel to the RA and Dec axis of the telescope. If the chip is not aligned with the axis it will have a problem calibrating/guiding as the calibration/guiding star image will move at a diagonal across the chip.
Power-up the Camera
Connect the power cable to the camera, connect the parallel cable from the camera to the parallel port (printer) on the computer, and finally connect the modular cable from the camera to the port marked "CCD" on the telescope base. After this is accomplished, power up the ST7. The ST7 can be ordered with either a 12vdc or 110vac power supply. You are now ready to balance
the telescope.
Back
to main menu.