I heard about this dome in February, 2003. Apparently, someone was selling a house in Phoenix
and wanted to remove the dome from the back yard. The realtor told someone in the East Valley
Astronomy Club, EVAC to pass the
word along-If you can haul it off, it's yours for free." My club, the Saguaro Astronomy Club,
SAC, mentioned it at the March meeting.
I figured it would go quick. April came and so did a couple emails to a distribution list I
belong to.
Same message, "Come and get it and it's yours." I couldn't believe it was still available. Well,
May brought another reminder, so I figured I'd take a look.
Here's a series of pics showing the disassembly process in Phoenix.
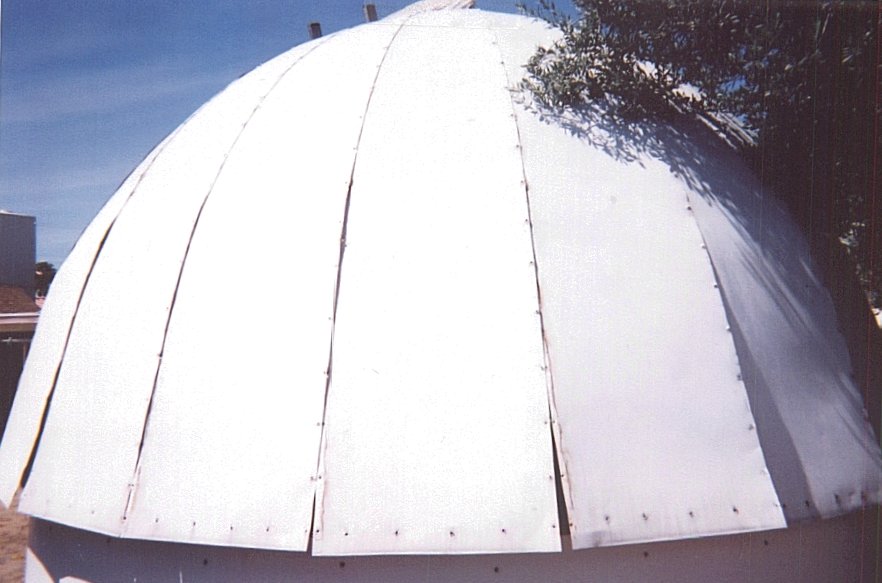
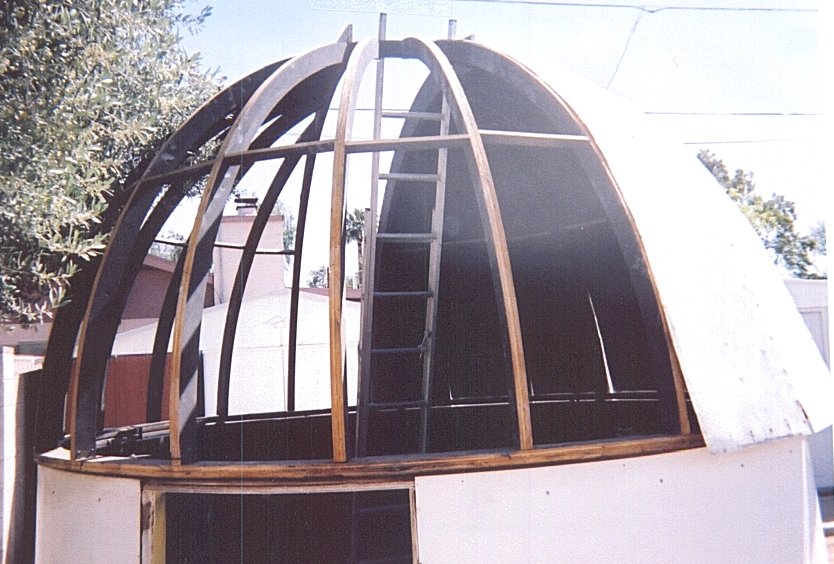
The first thing to do was remove the 19
panels I call the "skin" from the dome rib work. These were nailed with aluminum nails on the outside,
tacked in place with smaller nails and sealed with a bead of silicone caulk from top to bottom, (or
bottom to top, hard to say.) We pulled all the aluminum nails out, one by one, then cut the silicone
loose with a window scraper as high as we could reach from the ground. The result is shown here. Kind
of a Dutch Boy haircut, huh? "Hey! Where's the dyke?!" (Just for posterity, this was undertaken at a point where
my back had been diagnosed with osteoporosis, having lost a high percentage of bone from my lower 4
lumbar vertebrae. The pressure placed on my nerves leading to my legs created pain beyond imagining
for most people. I was, at the time, mostly unable to stand for more than 30 seconds before the pain
became excruciating. Frequent breaks and Zen/Samurai/Ninja pain management allowed me to prevail. That and,
oh yeah! A free dome!)
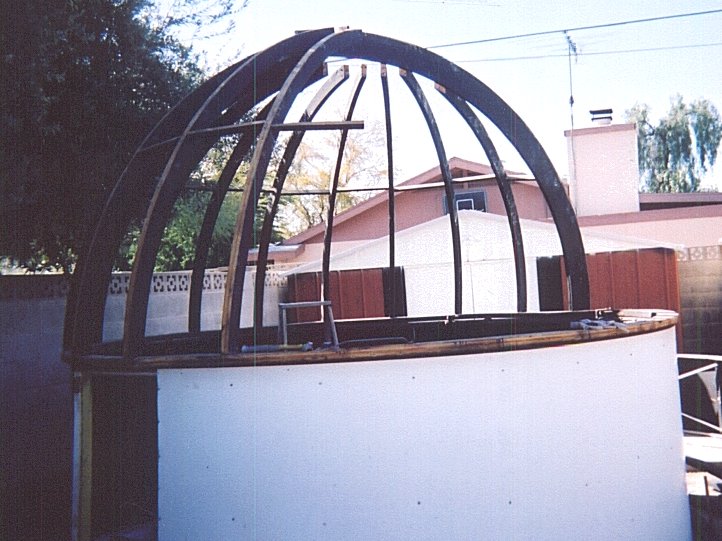
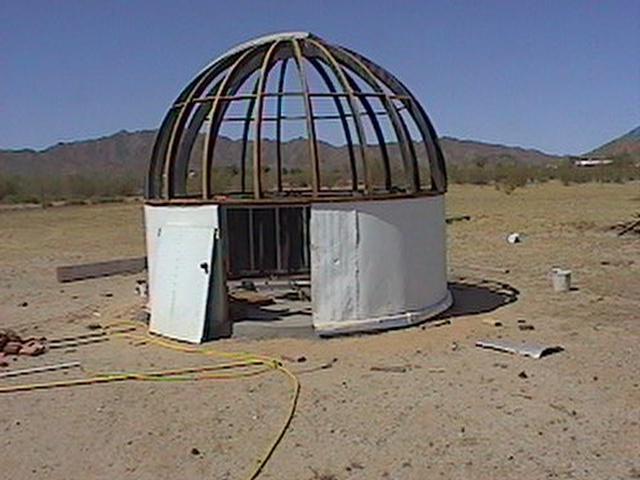
The box in the center is for a future pier. After a week or so, I removed the forms and began assembly. You can see the test fitting and basic structure
of the walls behind the pad. Unfortunately, it wasn't quite
that easy. There were a number of rather serious shortcomings with the building up to this point.
First, when they poured the concrete pad, they used the rotating ring as a guide for the forms. This ring
is 3" larger in outside diameter than the wall, so the skin on the dome overlaps the wall, minimzing water and dust
infiltration. It also greatly affected how the walls fit on the pad itself-it was too big around for the
walls to fit properly, and because the bottom of the wall has the gap for the door in it, the bottom was bigger
around than the top, making the overall shape a truncated cone, rather than a short cylinder. This screwed up
the mounting for the door and the attachment of the single sheet of wall aluminum. You can see the patch I had
to add by the door, and other views show where I had to cut the original wall piece to make it fit. I also had
to add a flashing strip around the bottom to prevent water getting underneath the floor ring and rotting, as it
did at its former home.
Second, (or is it third or fourth?), while the top of the wall of the dome was level at the old site, the concrete
pad was even. The bottom ring of the wall was placed on the uneven surface, and the length of the studs were adjusted
individually to level the top of the wall. I didn't take this into account when I reassembled it, so the top of the new
wall followed the inconsistancies of the old floor. When I assembled the dome, the bottom ring sat on bricks of equal
size, resting on the uneven top ring of the wall. Therefore, the bottom of the dome is as uneven as the top of the wall.
This is a major problem. Rolling the dome requires overcoming the "rollercoaster" of the rings AND the wall. There
are spots where only 3 of the 8 wheels are in contact with the dome, making it hard to turn. At the same time, there a
re spots whem low points in the dome meet high points in the wall and they scrape each other.
I managed to "fix" this initially by raising the height of the wheels within the wall at the low points, but more work
was needed. (More on this later.)
Last, (for now), in "stretching" the wall into a cone, it wasn't done evenly, so the wall is actually not round, in
addition to the cone shape.
Needless to say, the next dome I build will be much more carefully measured in all respects. Each piece of the skin was cleaned of old silicone adhesive and hammered by hand at the edges to smooth out the former nail
holes. Nineteen sections, each with two sides ~8' long. That took about a week. Each section was then attached to the ribs
with 9/16" staples top to bottom and sealed with silicone calk. I guess I could say here that this last fall, I worked on the uneven ring problem. I used a laser level to set a line around
the ring and measured up from there to find how much to shim the studs to make the top of the wall level and even. I raised the
dome up on bricks again, lossened the skin from the walls and shimmed the top ring at each stud. It took a couple days. Then,
I set all 8 wheels to the same height above the top of the wall. It seems to have helped, but not enough. to fix the entire problem.
It looks like I may have to do something similar to the end of each rib in the dome to smooth the bottom of the ring. It's either
that or totally undo the whole dome, staples and all, then reattach the skin to the ribs. Might as well build another dome from
scratch. Hmmmm....
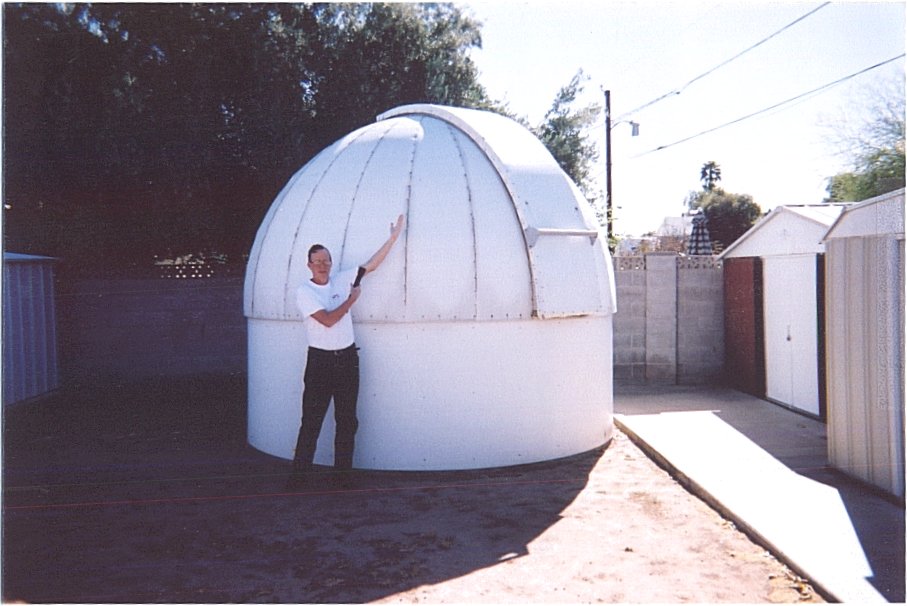
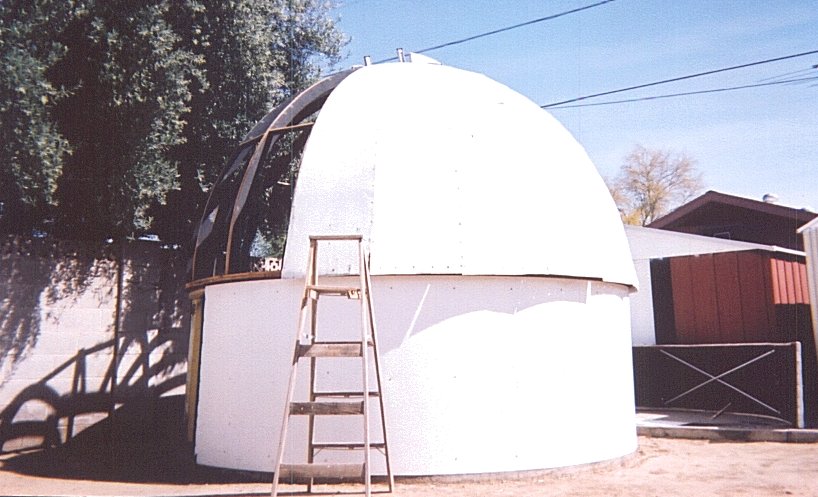
Here's how it looked in the old yard. Barry is 6'2" tall. It measures 12' in diameter.
The wall is 4' high and the dome rises another 6' from there, making it 10' high at the center.
It wasn't in too bad a shape, considering its age. The paint was chalky and dented by hail stones.
There was some patchy dry rot where water had collected under the bottom ring of the floor near the
door, and the clamshell was going to need rebuilding from scratch, but mostly it was solid.
It took us 2 days to label it all, take it apart and haul it off. The first day I forgot the
good cameras, so these were taken with a disposable one.
After that part was done, Barry stood on the ladder inside while I peeled from the ladder outside.
I could scrape the silicone just high enough for him to continue from the inside all the way to the top.
Each panel was done this way, taking maybe 10 minutes per panel. We had to be careful not to get cut by
the sharp edges of the aluminum and not to bend it too much at the top, when we were tempted to just
rip it off the glue. If we creased it anywhere, it would be a trick getting it straight again. More
on that later on. This shot was taken after the first two panels were removed. The "bonus" shadow on
the left is Barry's finger. (I recognize the fingerprint, don't you? FBI?) ;-)
The halfway point. Nine panels to go!
Here's a wider view of the same stage. You can see the ladder I used from the ground. Also, the
clamshell laying on the ground on the right of frame.

Ok, we're making progress. All the aluminum skin has been removed from the dome, and we're ready to
take it apart.
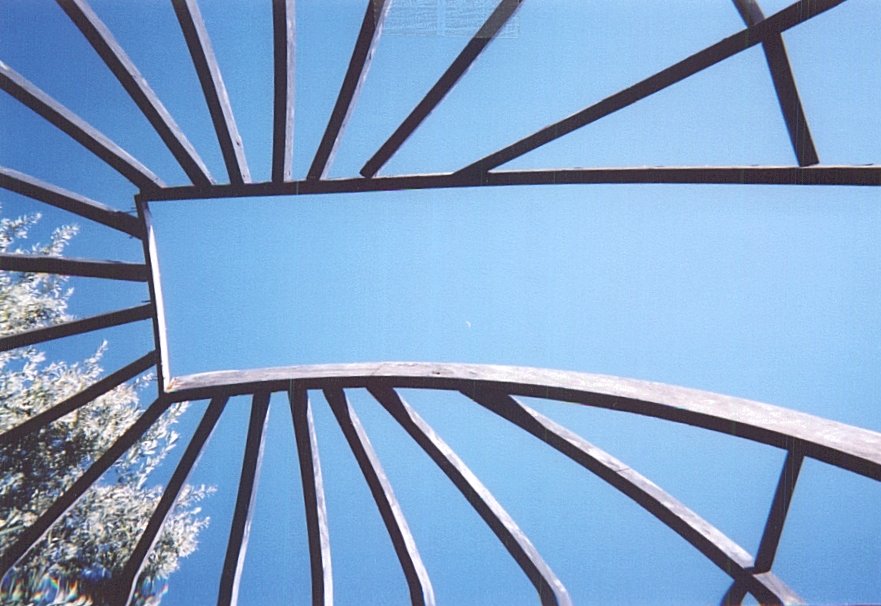
This is where we left off after the first day. If you click on the image, you'll find the Moon framed
in the shutter. There's a similar shot through the spider of the rolloff here.
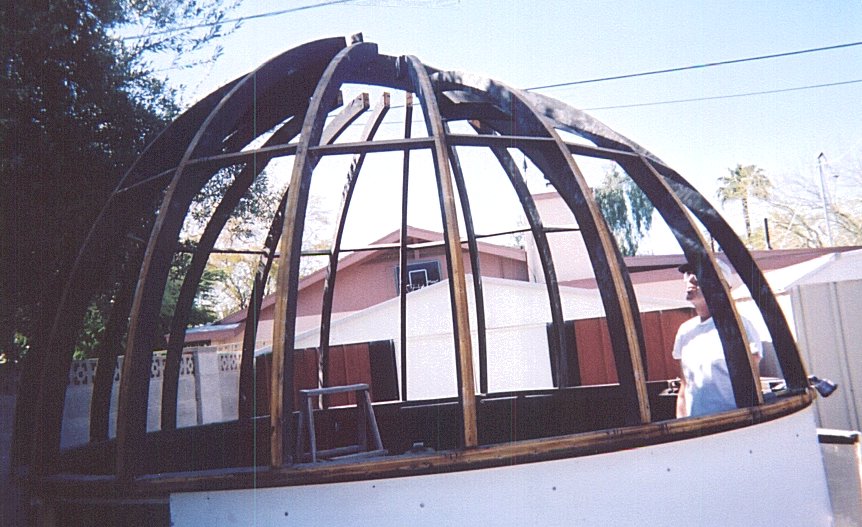
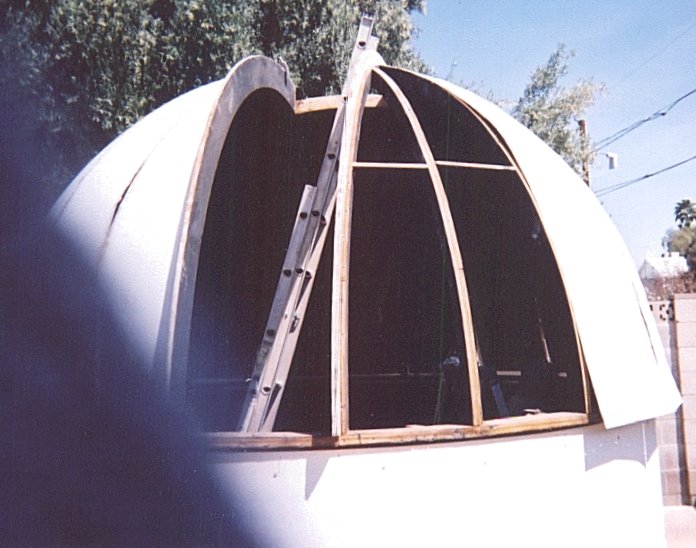
Here, we had started removing the ribs. First, we pulled the nails from the ones that connected to the shutter
and removed them. Barry's looking up saying, "Now, you're sure this thing won't come crashing down on me?"
It doesn't look quite so funky from this angle. Barry's gona test my reflexes by tossing his hammer at me. I
wasn't fooled. :-)
The tricky part was the last few ribs. We left two toward the rear and the big ones for
the slot attached to each other, then removed them from the rotating ring. Finally disassembling
them on the ground.The dome panels were made of aluminum, as was the wall, except the wall was one large sheet-37'
long and 4' wide.
Here's a series of pictures showing the reassembly at SHO.
Dome-030530.jpg
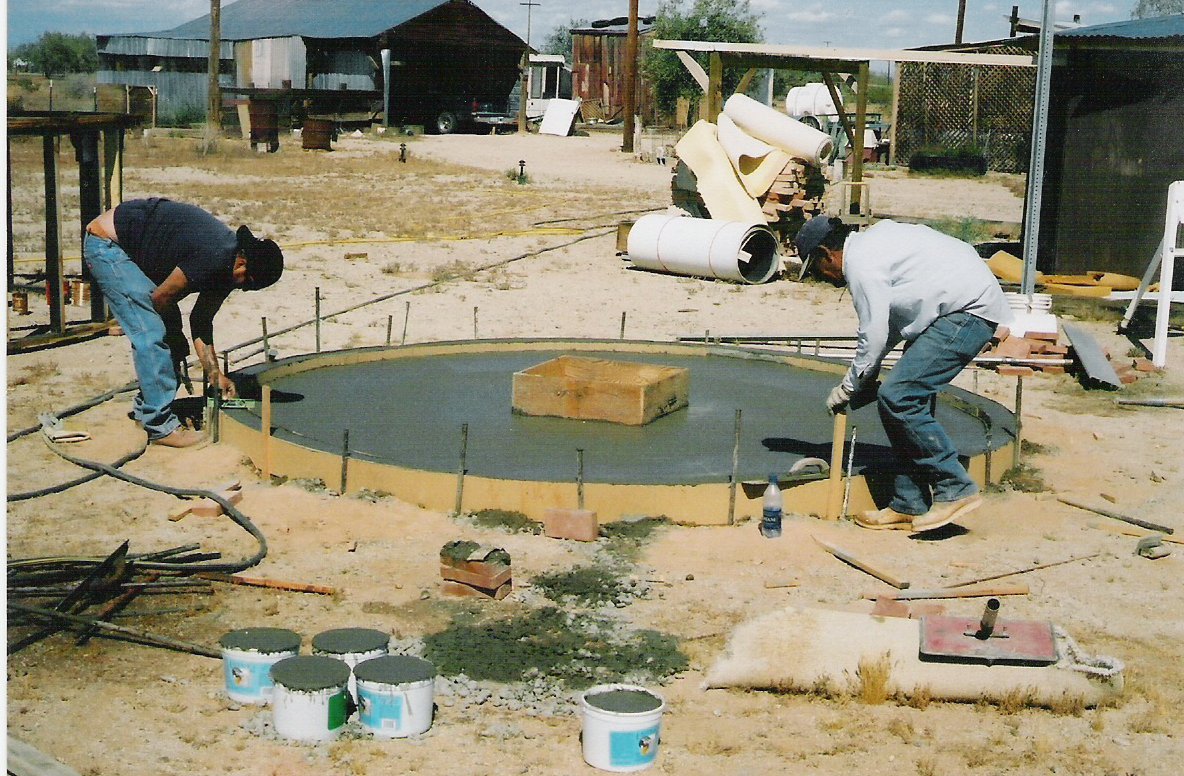
On April 15th, 2003 I had Rinker deliver 2.5 yards of concrete for the pad to go under the dome. Some local
concrete workers did a fine job of setting up the forms and floating the concrete. It took them about 3 hours
to get the concrete smooth and everything. They'd set up the forms the day before.
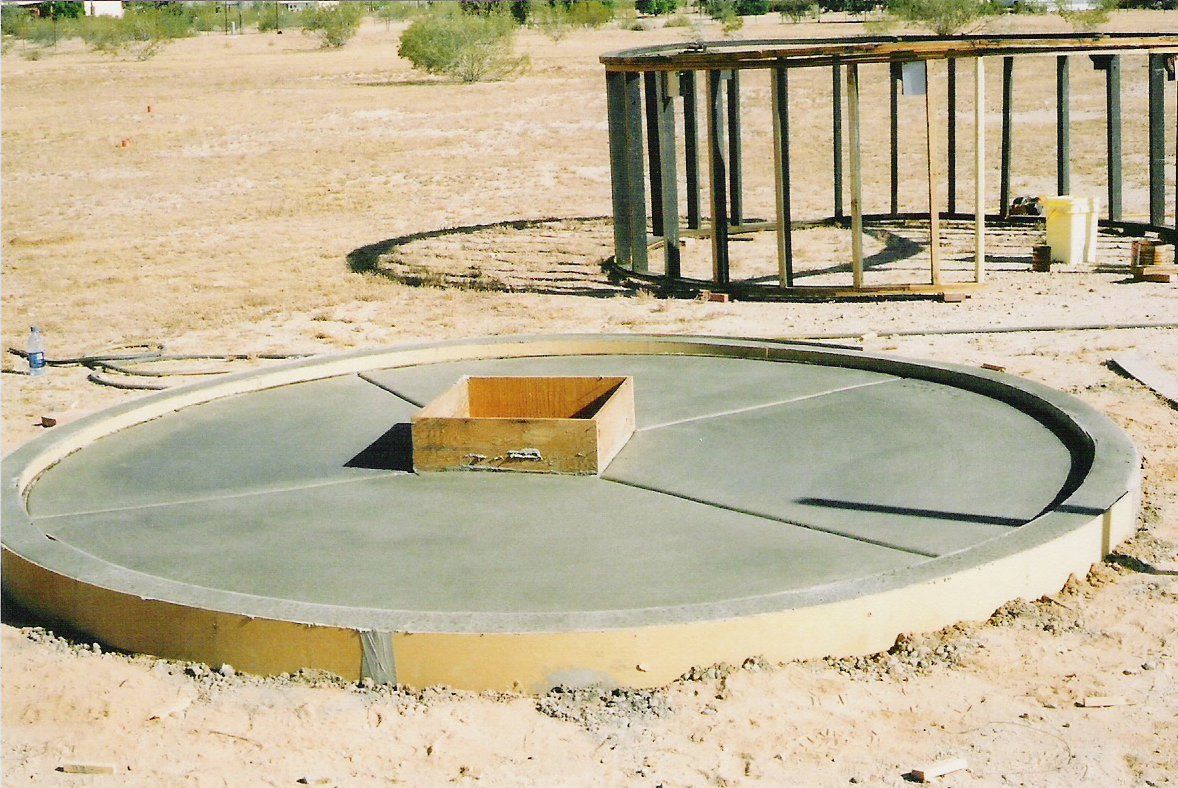
Here's the finished pad. I had them put a curb around the edge to raise the walls up a nit and to discourage
critters from getting inside.
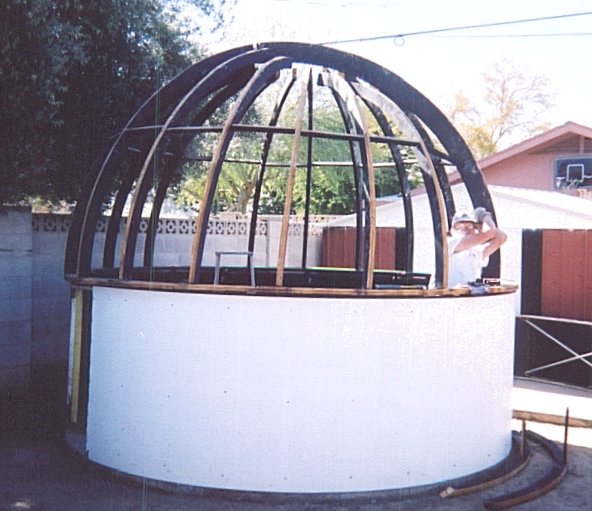
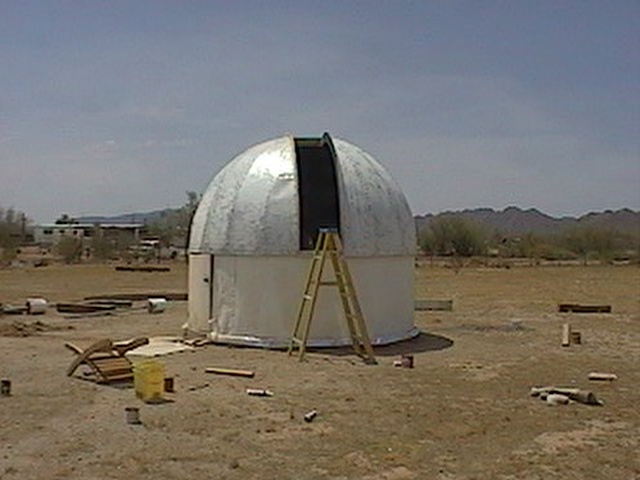
The walls are up, the dome is assembled and we're ready for the skin.
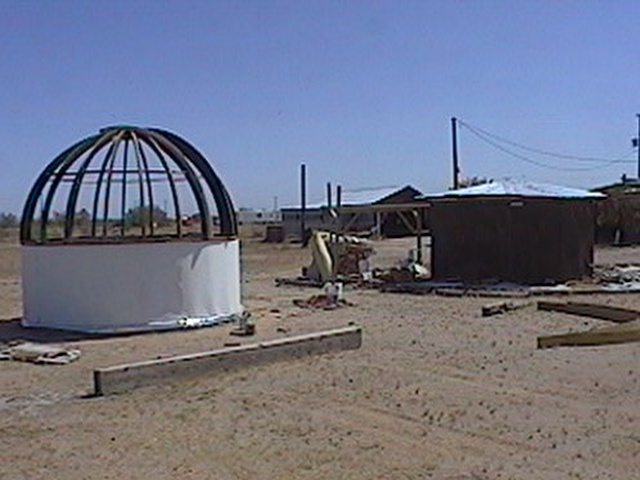
A view to the northeast, showing the roll-off observatory, the dome so far and some materials including
the forms for the pad and some carpeting I didn't use. (It's over there, under the rails for the roll-off...See? Right
there!
View to the northwest, shows the Pieramyd ©, both observatories and Skeet, the Dog.
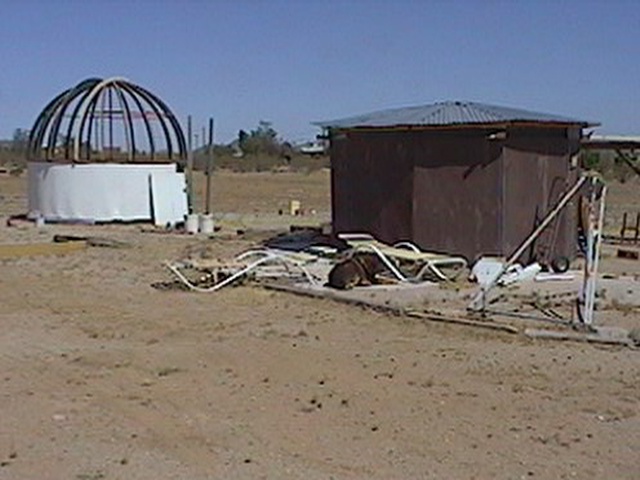
View to the southeast shows buildings, obviously, a better view of the carpet, if you care, and part of the
S.H.O. orrery. Yellow bucket represents the Sun, Four inner planets are there. too.
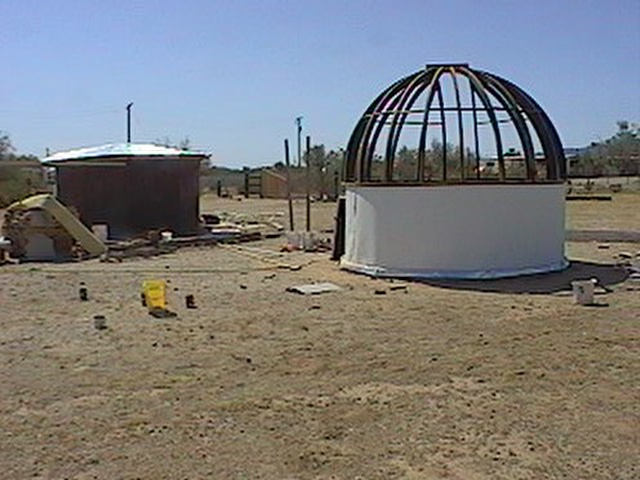
Ok, here we're looking southeast and the most obvious feature is the dome skin is installed.
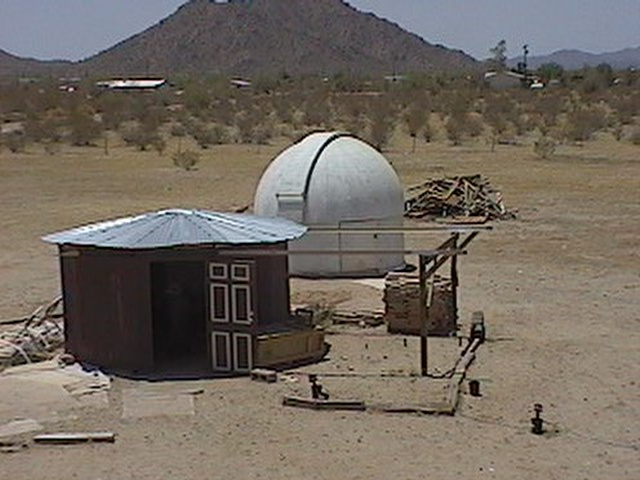
Dome and rolloff from the roof of the house, before the storm blew off the rolloff roof. The dome is painted
with "Kool Seal"® an elastomeric, highly reflective roof coating. It reflects so much heat that the interior of the
dome remains at ambient temperature and is notably cooler than the silver metal of the roll-off. It's even cool to the touch,
even at 115º F!
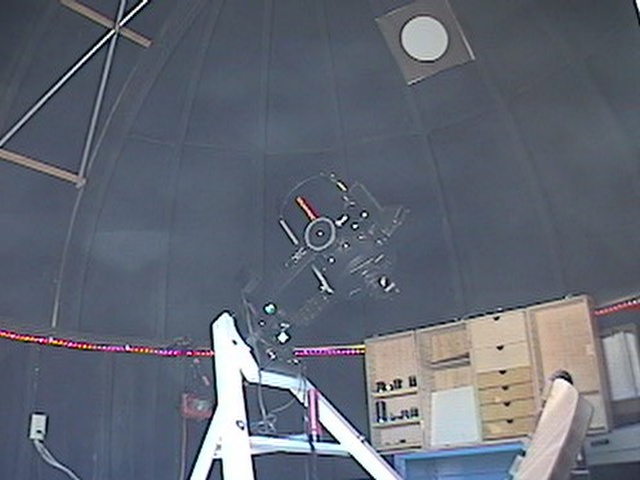
Mostly straight shot through the door showing top of the isostatic mount, C8, EP case, chair, dome
walls, red rope light, clamshell and one power outlet. Also seen is the dome flat for CCD camera use.

Low angle shot showing the ep case, C8, flat target and clamshell.
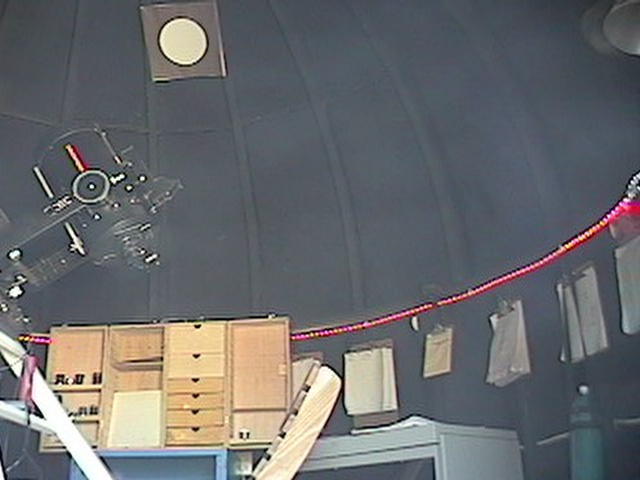
Low angle shot showing the ep case, C8, red rope lights, clip boards and the flat target mounted
on the dome.